Category Archives: Constructed Photography

Week Three: Studio Workshop Session

After reading the module guide it stated that during the semester we would be split into groups to attend light workshop sessions. This week it was my groups turn for an induction to the studio. This was a complete new experience to me as in college I was more journalism based and focused on the theory side over the practical.
It was important for me to understand how the studio works, which will aid me to gain more experience on the photography side and seen as I have a lighting assignment to do, what a way to get started by testing myself in the studio.
Although this was a fun session, we had to get everything set up and running, which I found a little challenging as I didn’t have any experience working in the studio, however, I quickly got to grasp with the equipment needed and how it works. Unfortunatly I was unable to bring my camera to the workshop, therefore missing out on getting myself some snaps of the setup, however, below is a step-by-step guide on setting up in the studio.

LIGHTING CHECKLIST

1 IN THE STUDIO:
Set up the backdrop first. Wind off enough Colorama before raising the backdrop on the stand and remember to clip the remainder to stop the roll unrolling further.
2 When you set up your stands for the backdrop and lights make sure the horizontal struts in the base tripod are at around 90 degrees to the central column of the stand.
3 Make sure that you put the heads on the stands the right way: VERTICALLY, with the tube on the light’s bracket completely mounted on the brass fitting at the top of the stand. DO NOT put the brass fitting through the horizontal holes drilled into the tube.
4 Always raise the stand by the lowest section on the stand for extra stability.
5 Make sure that your leads from the light are not causing a hazard or obstruction.
6 NEVER turn the light on before removing the plastic cover.
7 ALWAYS put a soft box on the light after removing the cover.
8 On the back of the light make sure that the ready button is on. Make sure that the beep is on or off (if you want the beep to tell you that your lights have recharged after firing). Make sure the cell button is on if you are not going to plug your camera lead into another light.
9 On the back of the light click the lamp button until the red light on the side is on for rel this means that the strength of the modelling light is the same as the strength of the flash setting.
10 Set the flash strength using the dials on the side.
11 Make sure that your light meter has the correct ISO (100) and correct shutter speed (125) for your cameras. You can change the ISO by scrolling with the horizontal arrows to the ISO icon.
12 Make sure that your light meter is on the correct programme – the lightening flash symbol– by scrolling through the different options with the horizontal arrows.
13 Always take a light reading when you move the lighting set up
14 Make sure that your fill light is weaker than your key light to create a modelling effect.
15 Raise lights up and the dip the heads down to cast shadows on the floor not the back wall.
16 Always make sure that your lights have cooled down before taking them apart and putting the plastic covers back on
17 For the portable lights: Remember that the modelling light will not work when the light is plugged into the battery pack.
18 Make sure that you have connected the two halves of the battery pack together. If you are only using one light remember to plug in the safety plug on the battery pack or the unit will not work.
19 Start with an ambient light reading and then fit your lights to that light reading. Remember that your shutter speed must be 125th or less. Adjust the lights and your aperture until you get the effect you want.

During this workshop I found the studio was simple enough to set up but what I found challenging the most was adjusting the light settings, as this was all new to me, but hopefully I will be able to experiment with the settings more when I revisit the studio for my lighting assignment. I enjoyed the experience as a whole, our group took fun photos of one another as this session as basically just an introduction to help us get use to working in a studio. Next time I will test the light meters by reading the reflective lights with the use of the handheld meter, which I think is incredibly useful for shooting in a studio.
Below are a set of images of myself and the groups experience during the workshop.

Week Two: Fashion Photographers and Portraits

What do we mean by a Portrait?
A portrait is basically the representation of what somebody looks like through the exploration of identity. The photo should be simple, the subject in the frame knows they are having their photograph taken, giving clear clarifications as to who the person. Photographers include clues and props shooting the portrait as this informs the viewer in more detail about the person, reflecting on their personality.

– Susan Bright Art Photography Now 2005

Striking famous portrait of Ernest Hemingway gives the viewer a solid understanding of Ernests personality

Striking famous portrait of Ernest Hemingway gives the viewer a solid understanding of Ernests personality


What do we mean by a Fashion Photograph?
Fashion images are more focused on the constructed side, as this genre of photography is usually a collaborative effort between a team, which includes, makeup artists, stylists, art directors, assistants and the client.
In the fashion world, the ordinary is transformed into the extraordinary and vice versa. Fashion Photography is blatantly concerned with the constructed photograph and also with what is classed as exotic, dramatic, glamorous and different.

– Anandi Ramamurthy Photography: Critical Introduction 2000

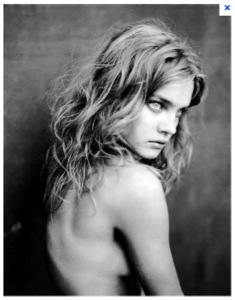
An example of a fashion image, which was clearly constructed together by a team of artists

An example of a fashion image, which was clearly constructed together by a team of artists

Week Two: Art Direction Research and Ideas

What is Art Direction?

Art Direction is the means by which the creative idea can be expressed.
(Nik Mahon Art Direction 2010)

Art Direction should help an idea rather than hinder it. Art direction should be a window rather than a beautifully painted wall.

(David Christenson – quoted by Nik Mahon)

The Art Director is the one who is in charge of the overall visual appearance and how it communicates with the viewer visually, stimulates moods, contrast features and how it psychologically appeals. The art director makes decisions about visual elements used, what artistic style to use.

Artist work idea Examples:
Psychology
Fear
Anxiety

American Landscape

Artist work production:
Narrative
Visual research into artists and Photographers
Production team
(Gregory Crewdson interview)
Gregory Crewdson Production

The Task
Pick a photographer and make an illustrated blog post about the ideas their work provokes in your mind:
seascape 1

seascape 2

The photographer I chose was Hiroghi Sugimoto looking into his seascape productions. Hiroghi is a Japanese photographer from the capital Tokyo and is well known for his explorations of the illusionary properties of photography. He began his early life studying sociology at St.Pauls University but moved to Los Angles to study Fine Art at the Art Center College of Arts and Design, eventually moving to New York establishing himself as a photographer interested in the representation of reality. The combination from sociology and fine art for me gives him the drive to photograph objects that give a feel of reality and the expectations of society.
His images of seascapes are striking and to me they give an interpretation of a new world, the light that reflects onto the water looks like a pathway leading me down to the future perhaps? Everyone in society has a journey through life, with expectations thrown left, right and centre. I believe the seascapes are an illusion of a journey, an achievement, moving from one world to the next. The unknown.

Research and Image Reference:
http://www.artnet.com/artists/hiroshi-sugimoto/

Constructed Photography – First Lecture

Observations and Constructions of photography

This lecture was based on the observations and constructions of photography.
Observational photography is shown when the photographer captures on film a photograph that shows a real life situation, showing emotions on the subjects face, weather its laughter, tear, joys, happiness, tragedy, comedy etc. Some people may say that observational photography focuses on the actual taking of a photograph, before an idea has being fully realised.
(Charlotte Cotton Words Without Pictures Aperture 2009)

Examples of Observational Photographs:
Photography by Jacob Riis

These two images strongly indicate observational photography as Jacob focuses on documenting the poor people and how they were victims rather than the makers of their fate. I feel by looking at these images that the men and children don’t have it easy. The images of the five men are taken from a tenement house, the expressions show they look miserable and unhappy with there lives. The same goes to the children who look exhausted, maybe they have been doing choirs or have no place to stay rather than the streets. These photographs to me look like they have been captured in the moment, they express so many emotions and give a clear example of the life of some people in the real world.

Jacob Riis, Five Cents Lodging, Bayard Street, c. 1889

Jacob Riis, Five Cents Lodging, Bayard Street, c. 1889

Children in the street

Children in the street

However, Constructed photography includes photomontage, staged imagery, images with text, any photographic imagery wherein the conceptual engineering of the artist is clearly evident.
(Liz Wells Photography a Critical Introduction 1997)
Constructed images is basically an image that is created by the photographer, it is set up. The purpose of a constructed photograph was to show us things that were felt rather than seen.

Examples of Constructed Photography
Photography by Gregory Crewdson

These striking images represent the work from photographer Gregory Crewdson, an American Photographer who is well known for his manipulated/staged images on households and human relationships. These style of images are clearly constructed, they are set up by the photographer in order to tell a story to the viewers that make them feel something.

Beneath the Roses

Beneath the Roses

gregory crewsden image constructed

Image Resources:
http://historymatters.gmu.edu/mse/photos/question3.html
http://piedader-letspractiseenglish.blogspot.co.uk/2011/11/jacob-riis-and-lewis-hine.html
https://files.nyu.edu/jp1961/public/crewdson.html